
Project
Background
Purpose
RF controllers are used as a way to create a general-purpose controller that can provide control functionality to a variety of projects that can benefit from it. For example, the controller can be used to provide acceleration or steering for an RC car, it can be used to control a robotic arm, or it can be used to simply control a servo motor.
Features
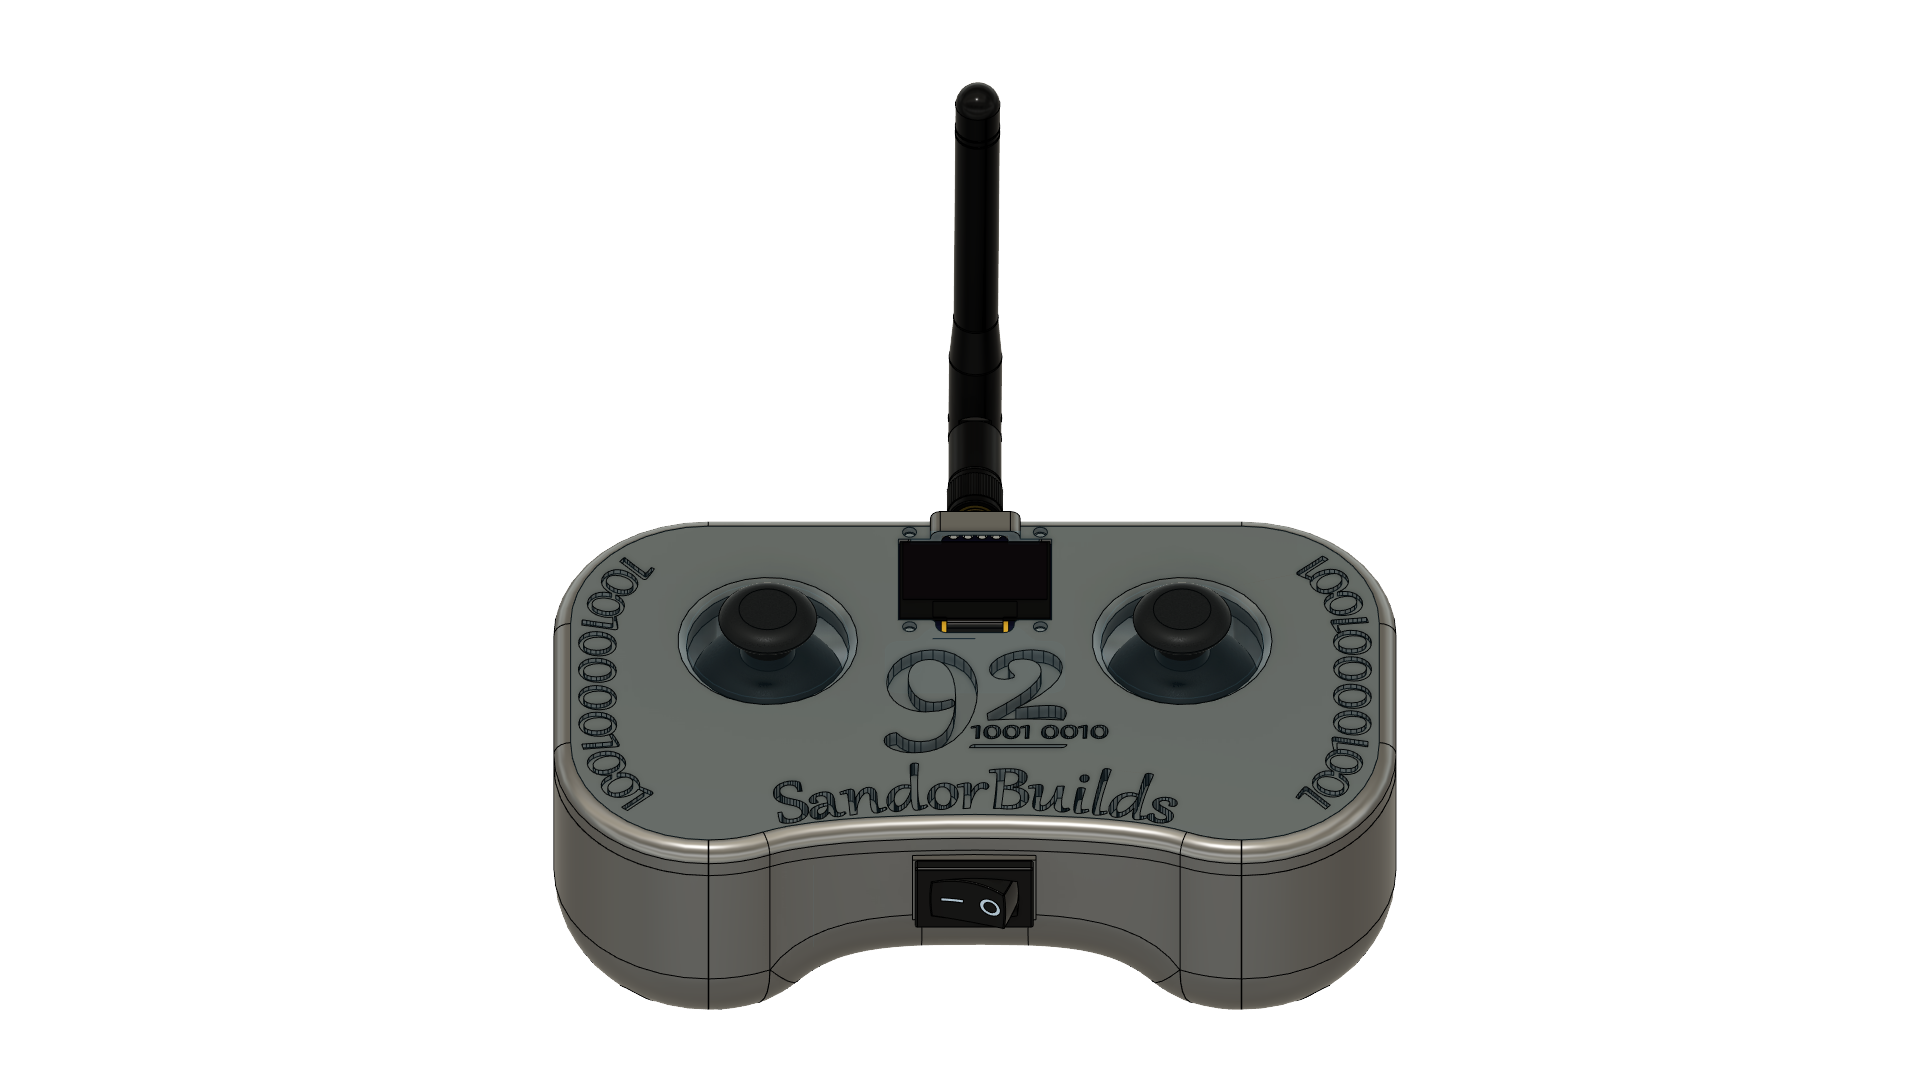
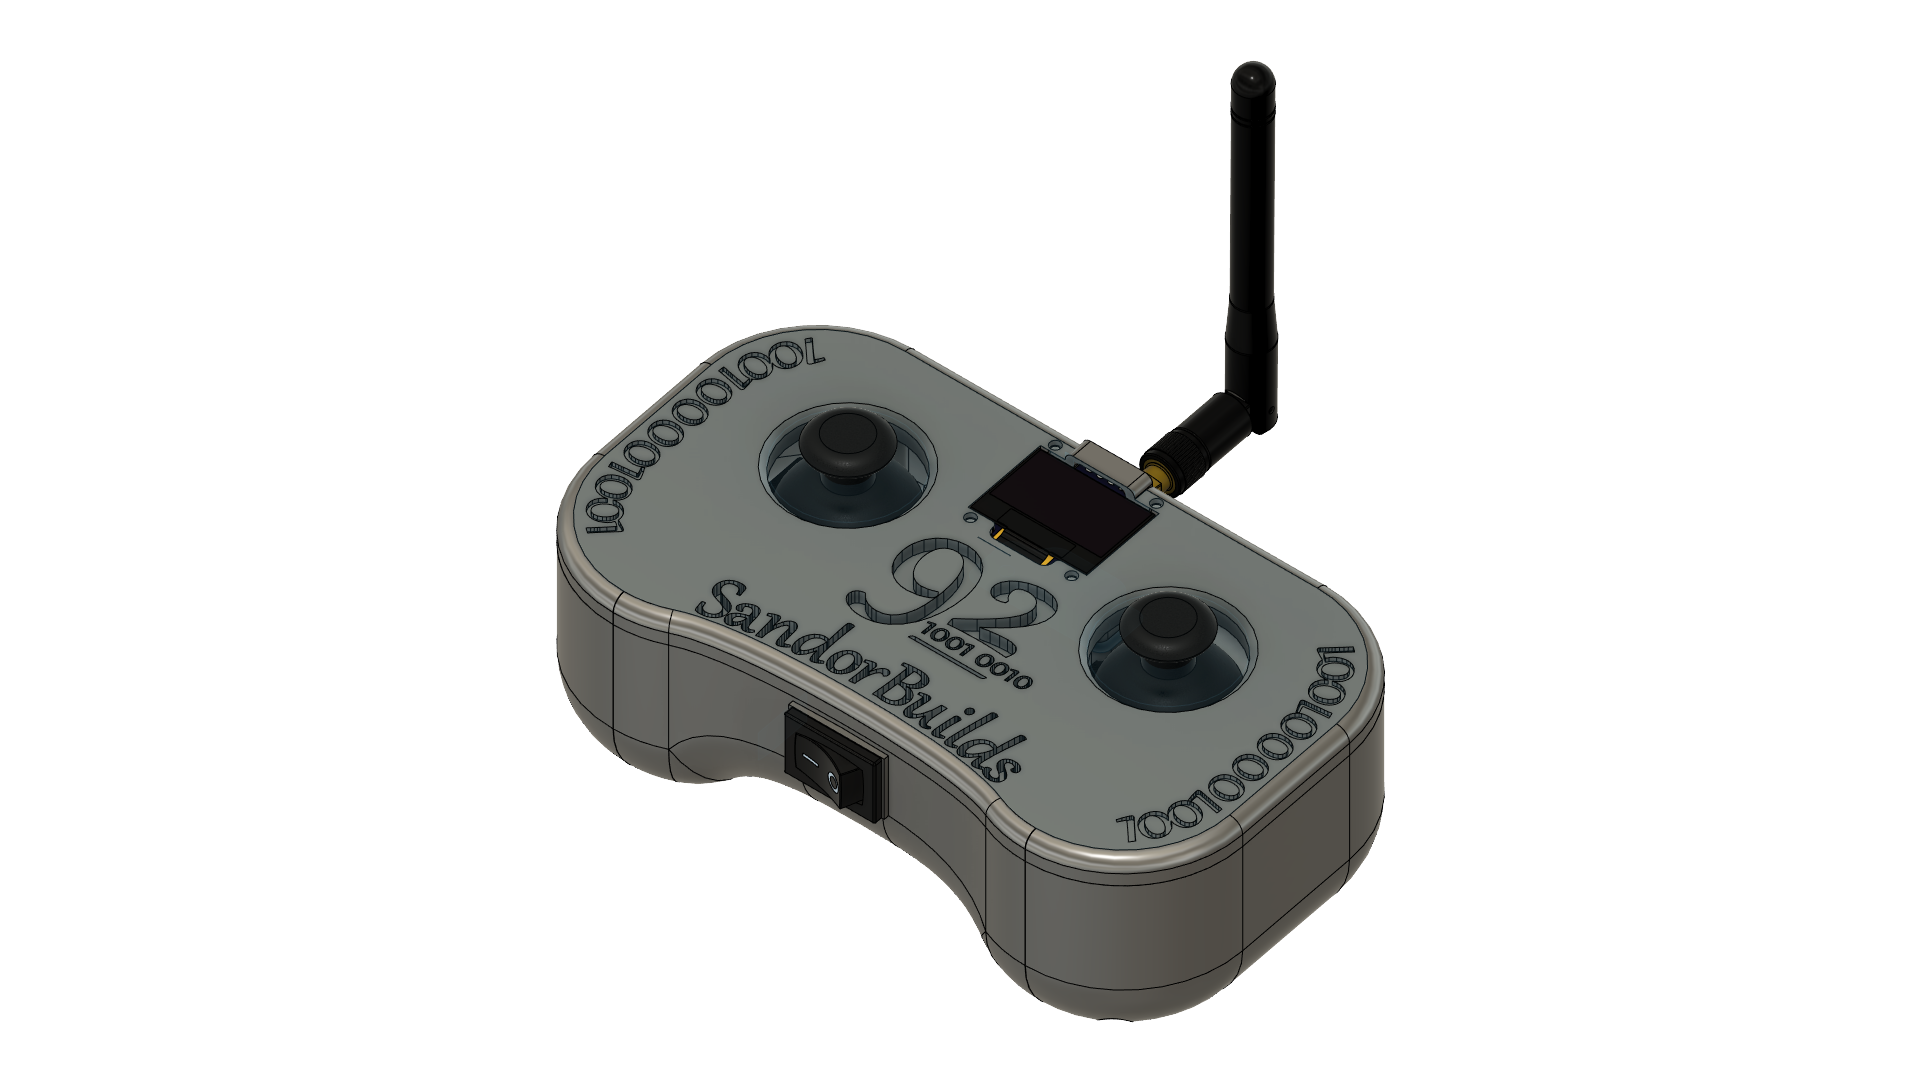
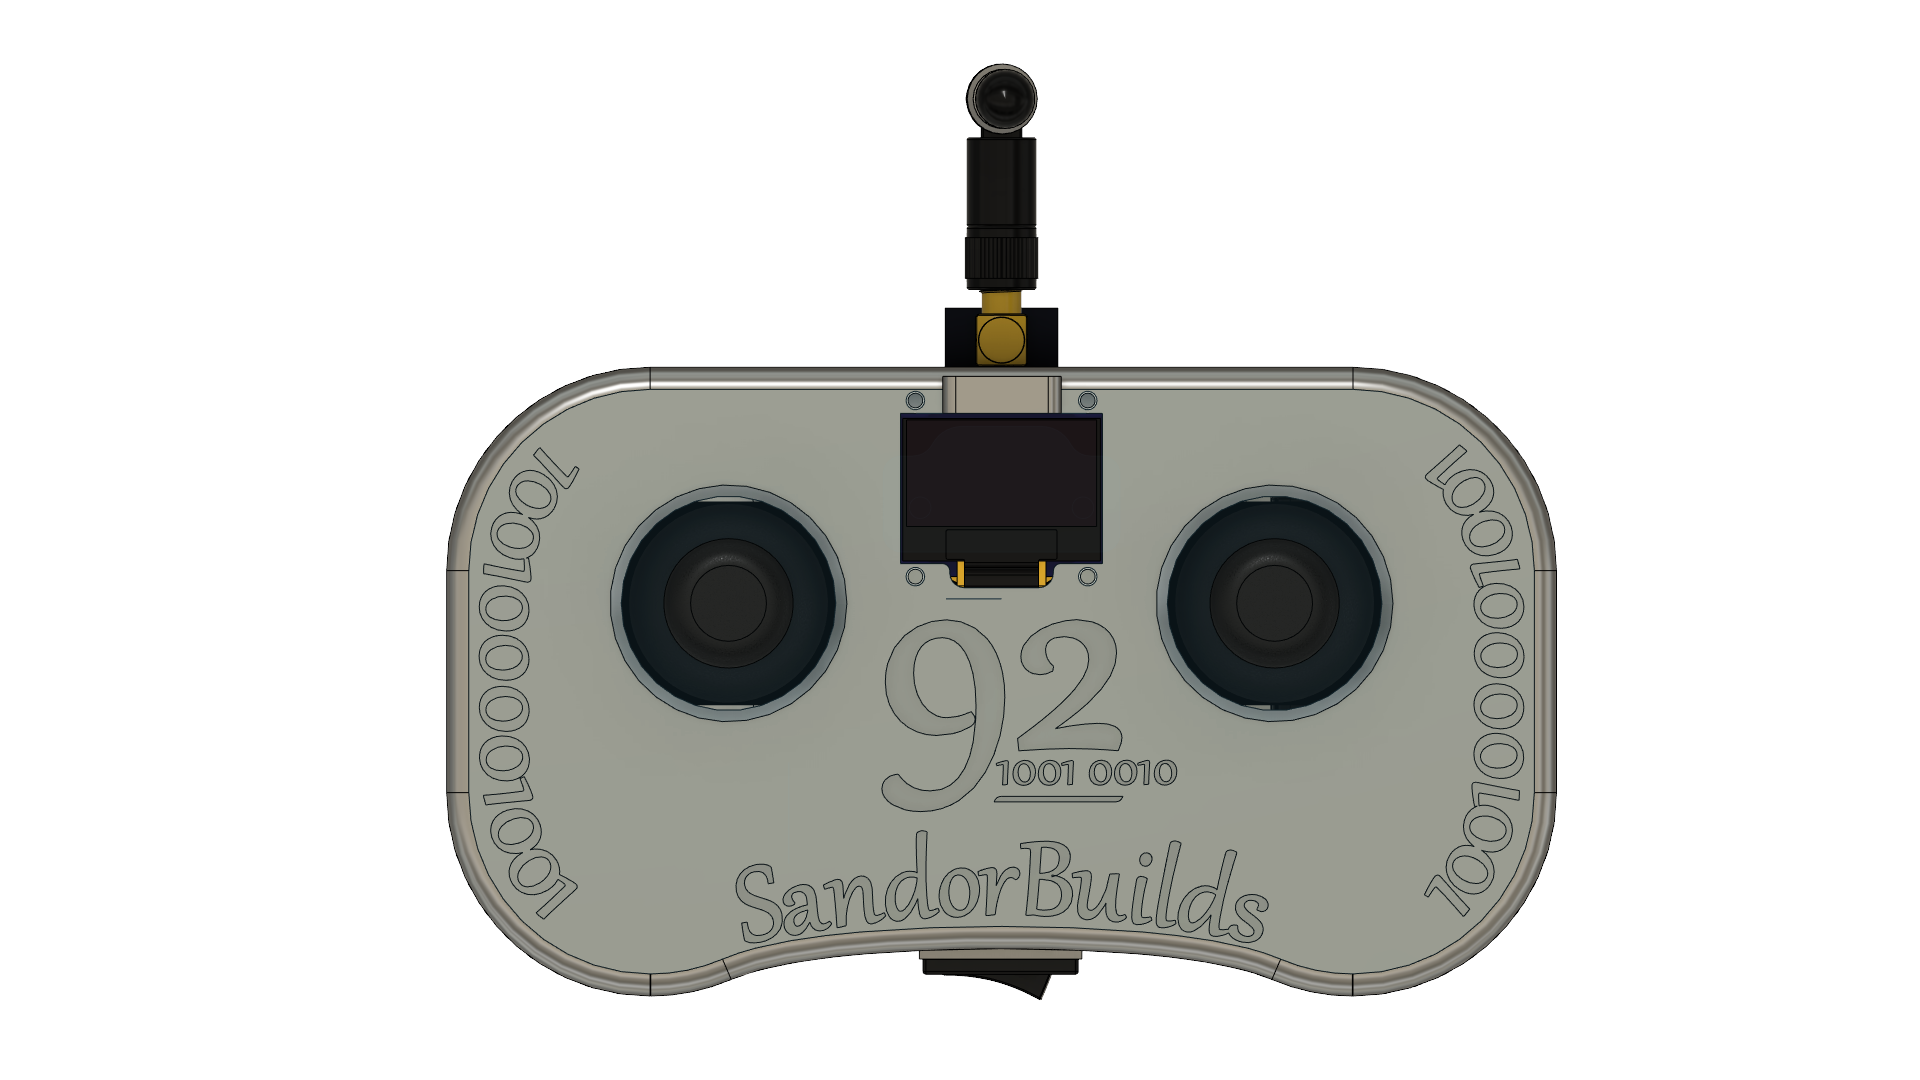
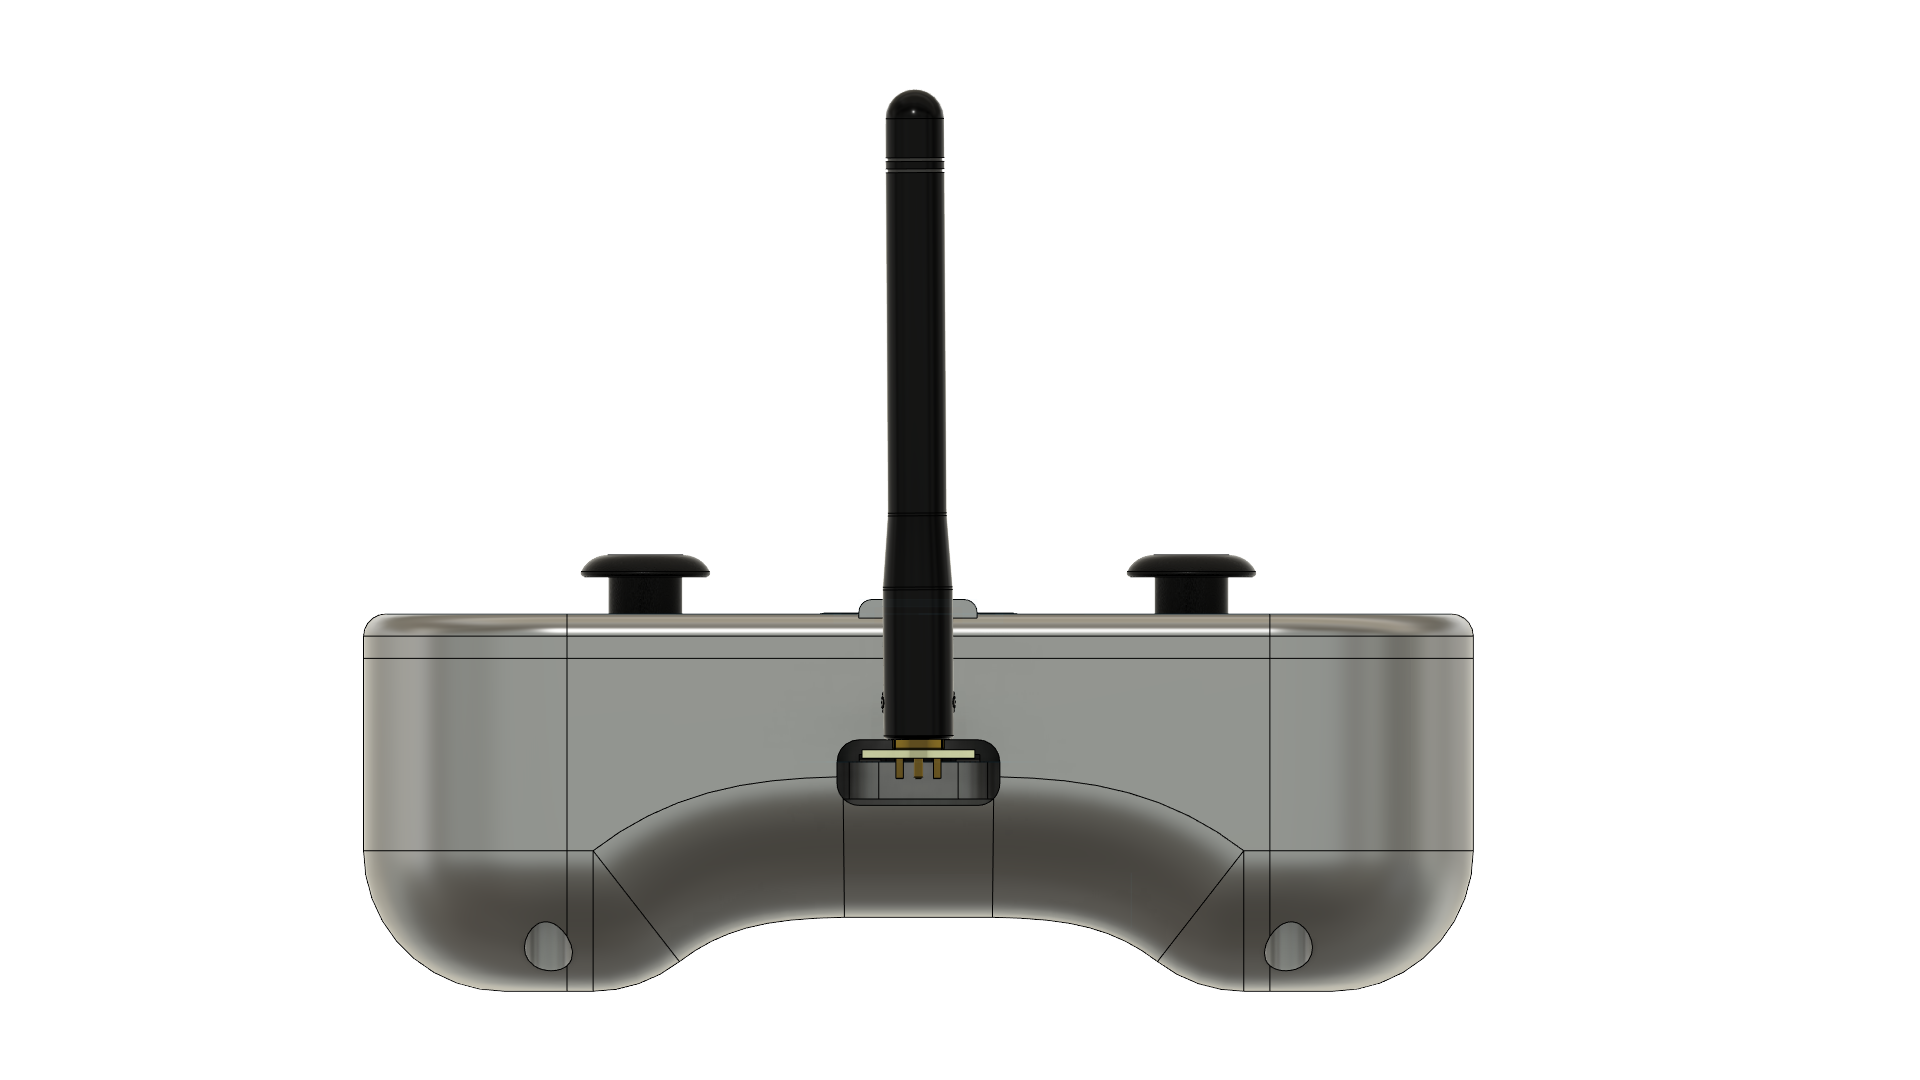
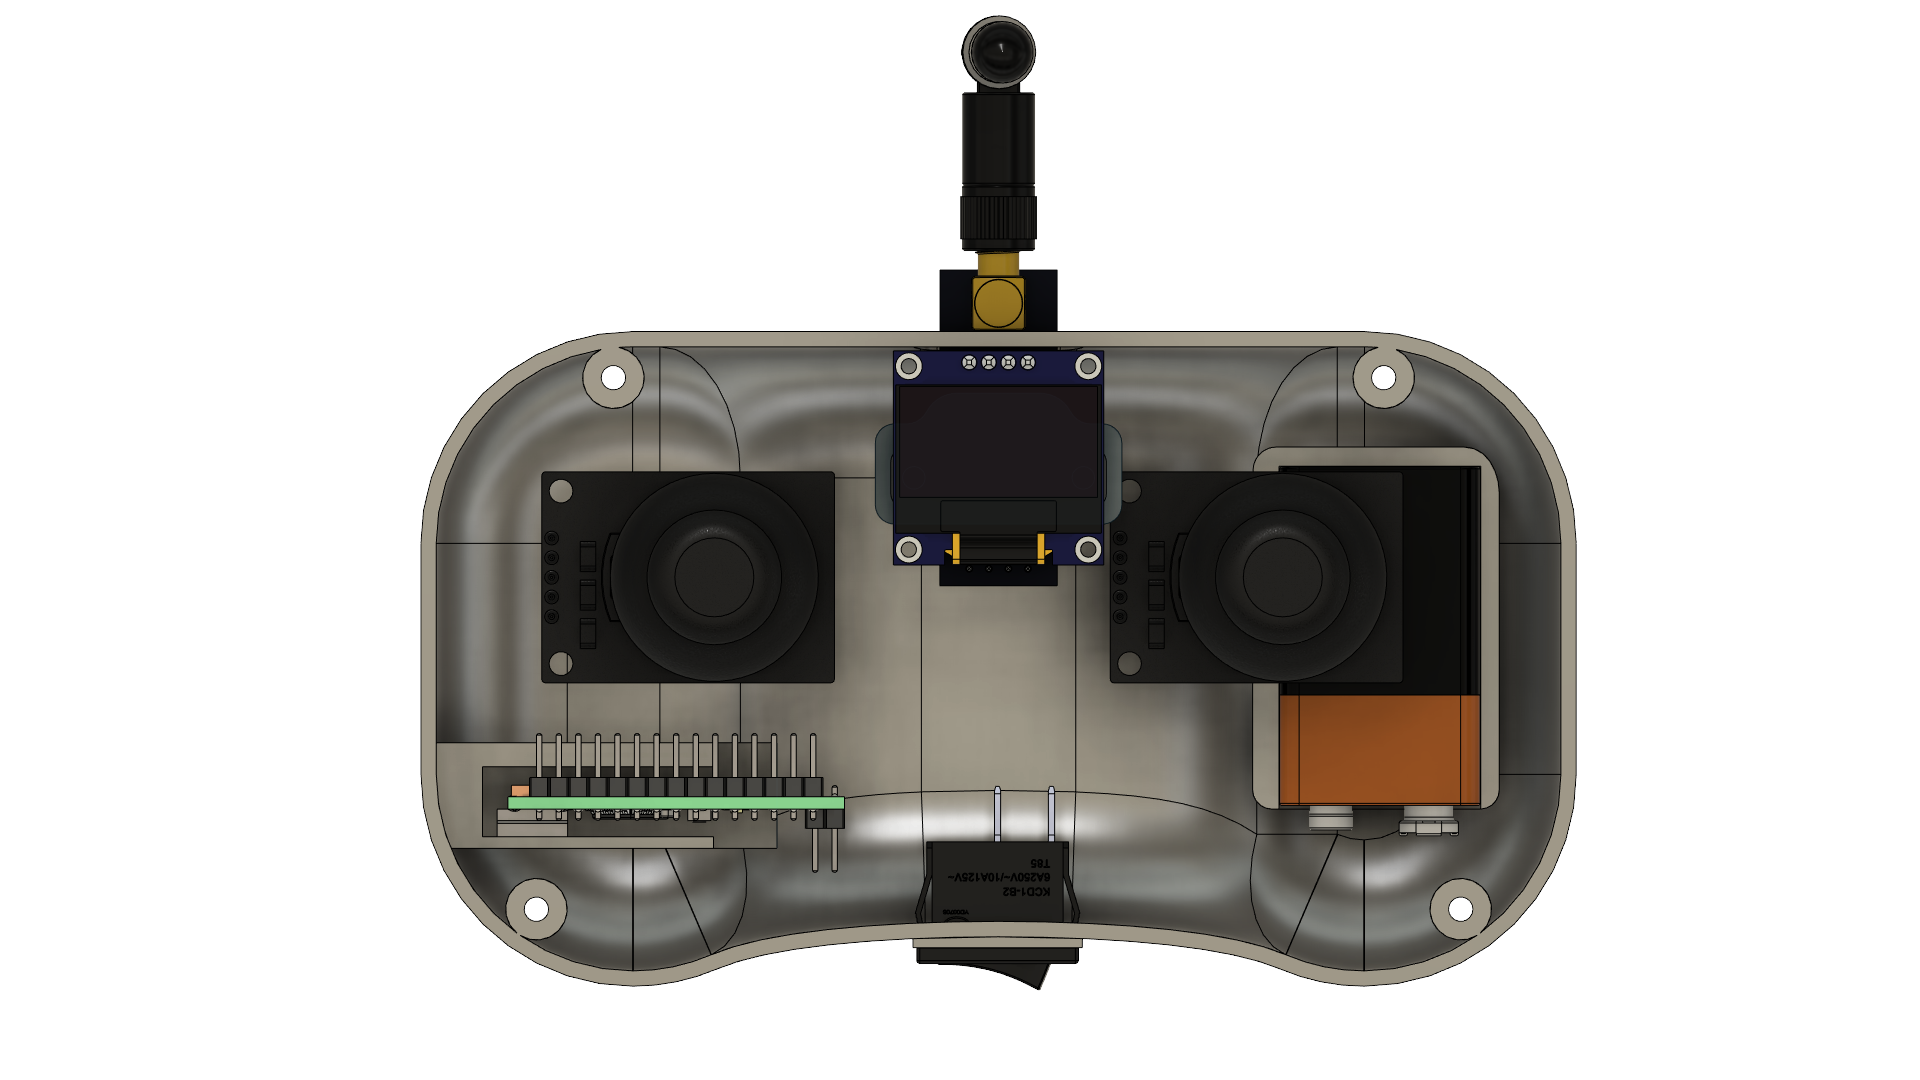
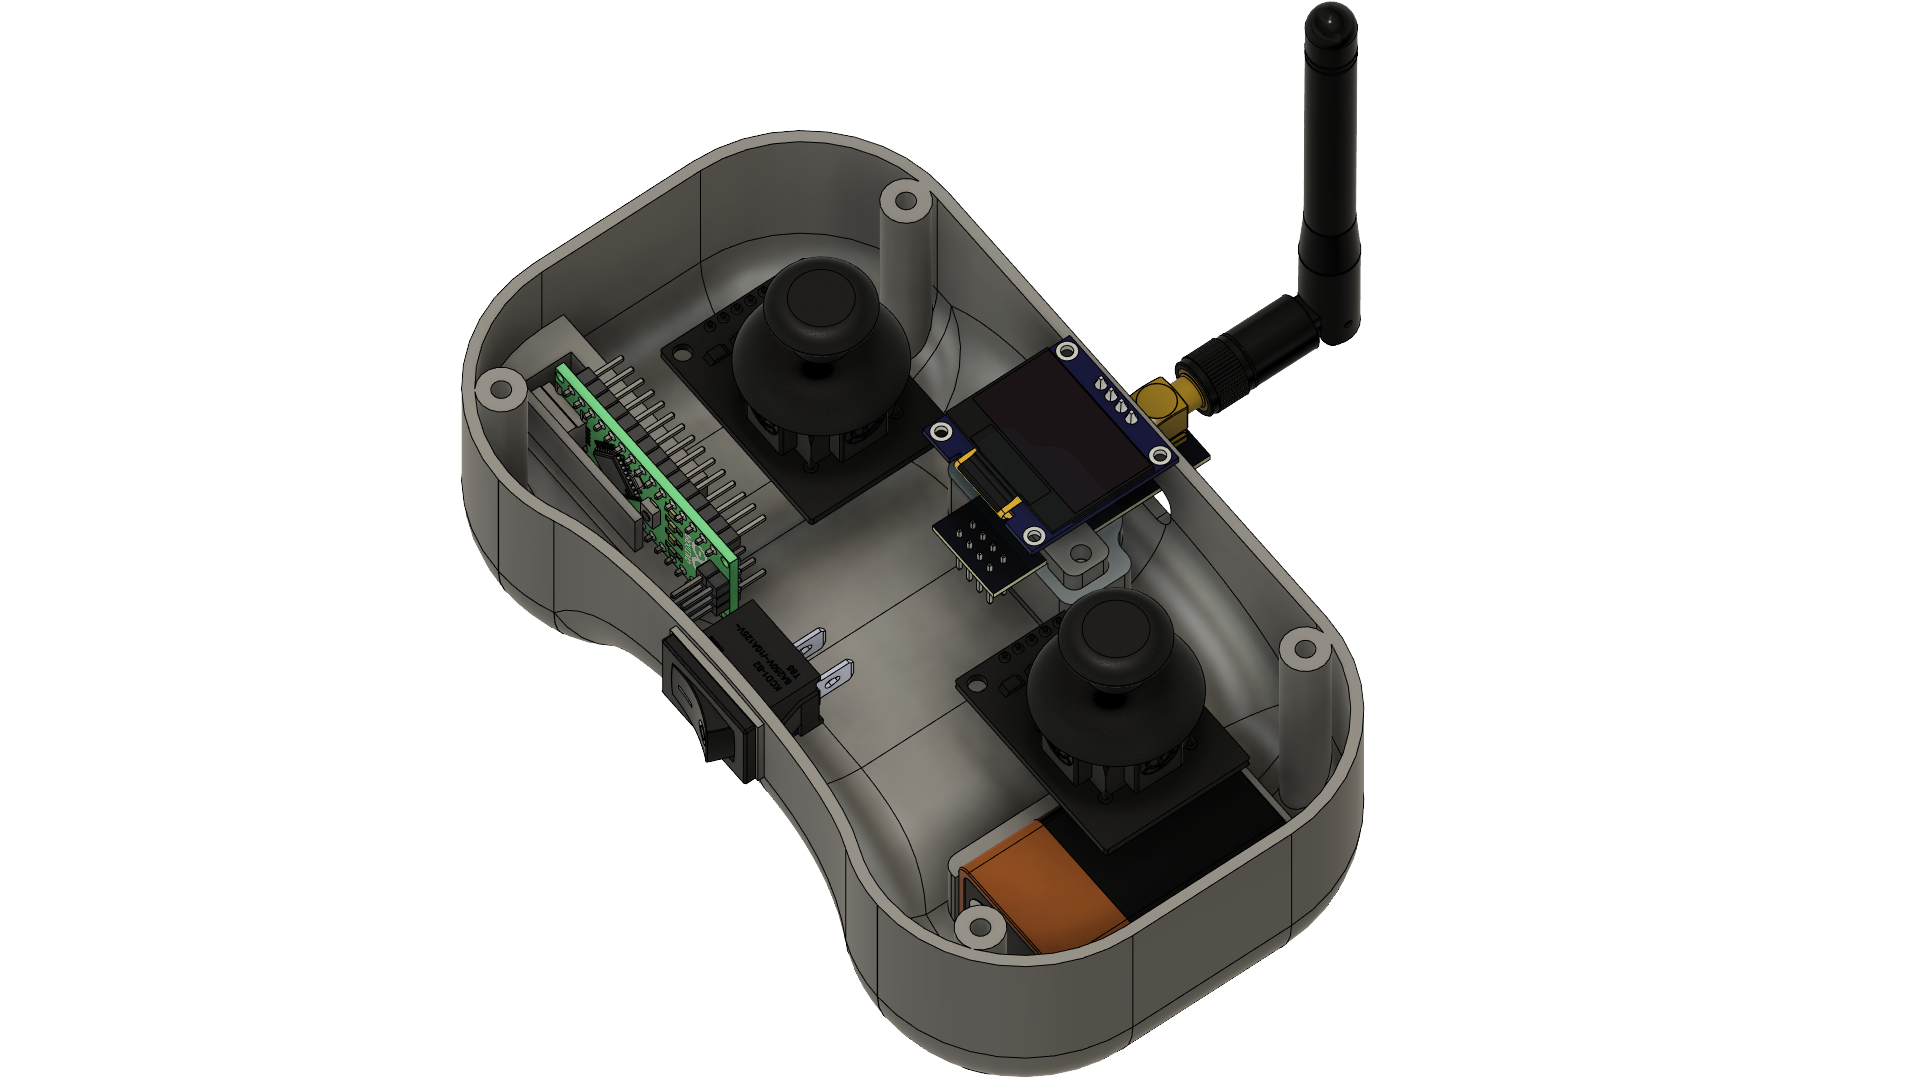
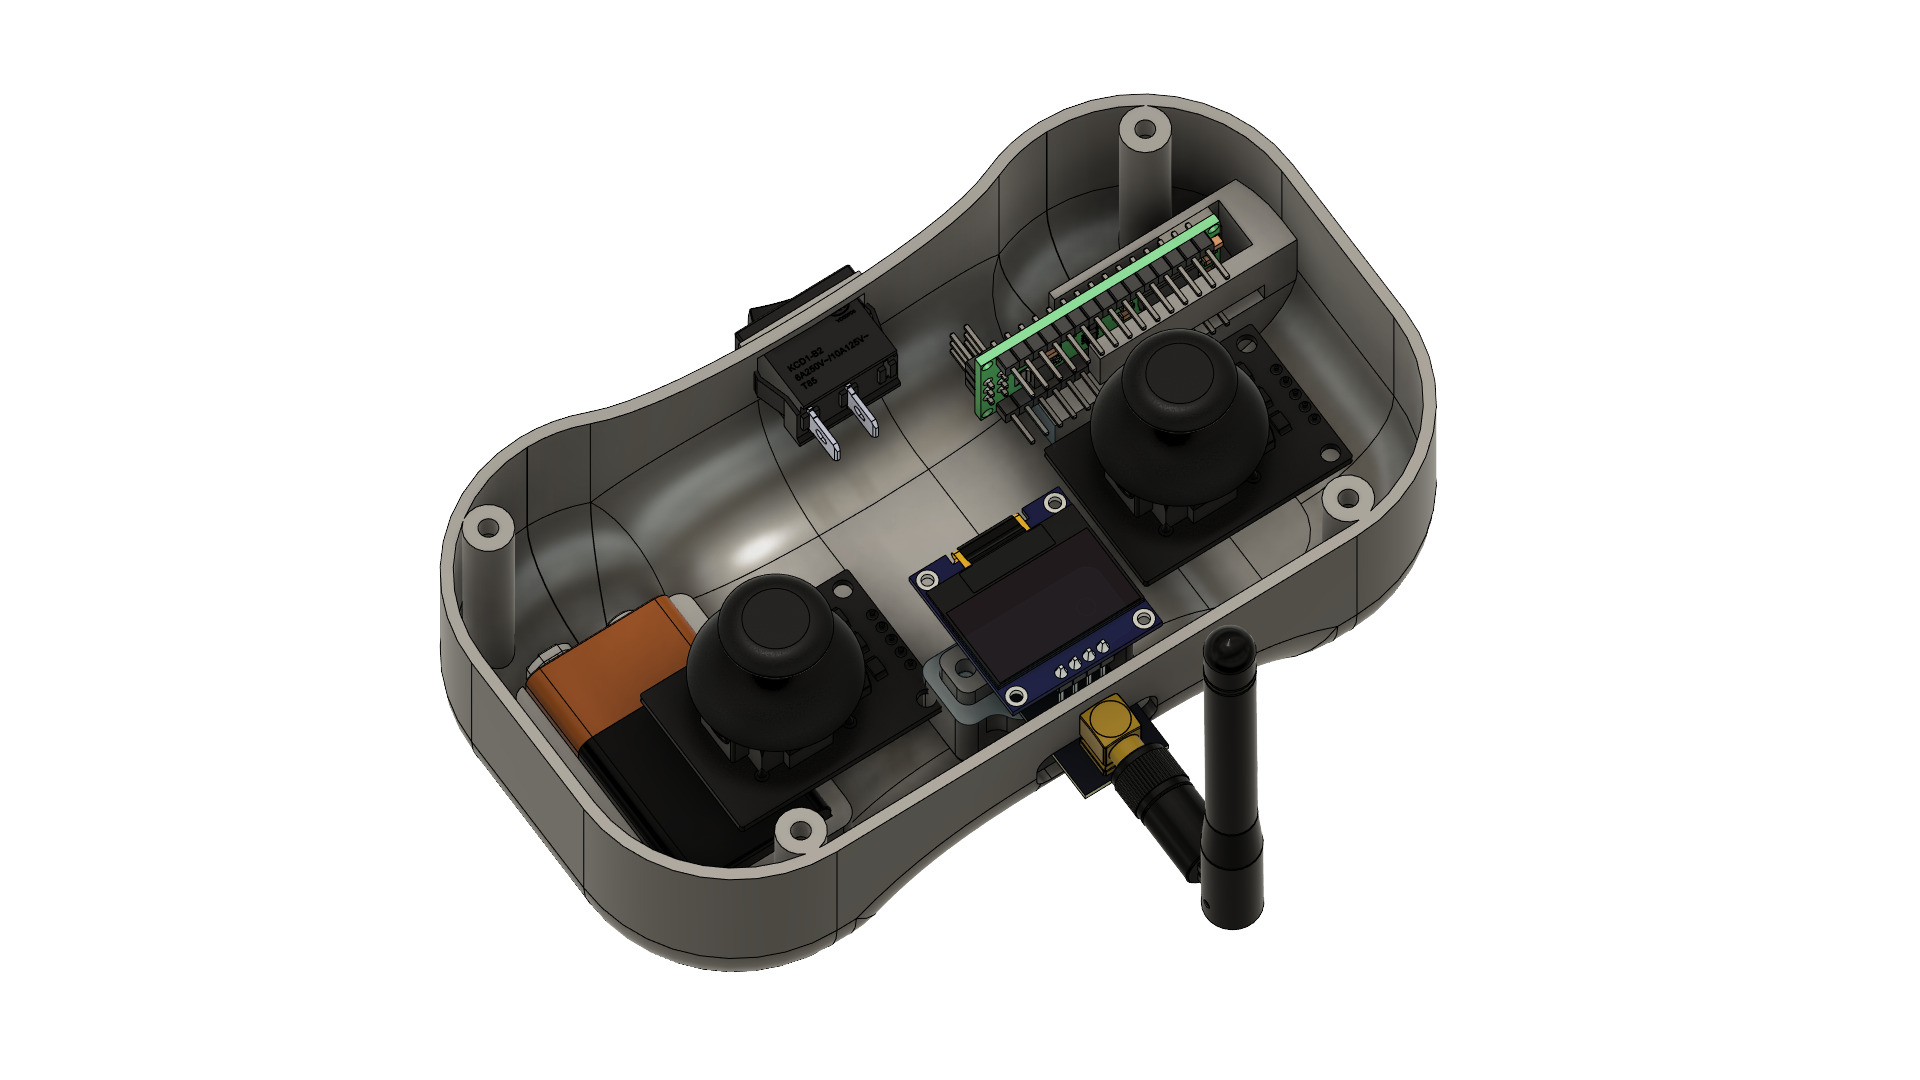
The RF controller features two analog joysticks, an OLED screen, an RF transceiver antenna (NRF24L01+PA+LNA), an on/off rocker switch, an Arduino Nano, and a rechargeable 9V battery.
3D Printing
The case that encloses the components were modeled using Autodesk Fusion 360. The case features two parts. A bottom layer and a top layer. The bottom layer provides room for the jumper wires, the battery, the Arduino Nano, and the RF antenna. The top layer is used to hold the OLED screen and the two analog joysticks. The top layer and the bottom layer are screwed into place. The 3D printing took approximately 4 days to complete, as complex curves and intricate small screw holes needed slower print speeds to print successfully.
3D CAD MODELING
IN AUTODESK FUSION 360
IN AUTODESK FUSION 360

LEFT
RIGHT

BACK
Side View
TOP

FRONT
BACK

BOTTOM

LEFT

RIGHT
Inside

LEFT
RIGHT
BACK
COMPLETE Overview & Explanation of the 3D Model in Autodesk Fusion 360
The Breakdown
Components
The project features the following components:
Jumper wires
Breadboard side rail (1)
SPST rocker switch (1)
Joystick Analog Thumb Stick (2)
0.96 Inch OLED I2C IIC Display Module (1)
Rechargeable 9V Lithium Batteries 5400mWh USB (1)
RF transceiver antenna (NRF24L01+PA+LNA) (1)
Arduino Nano (1)

Time-lapse video of the building process
Short narration: Breaking print supports on the freshly 3D-printed bottom case
Schematic
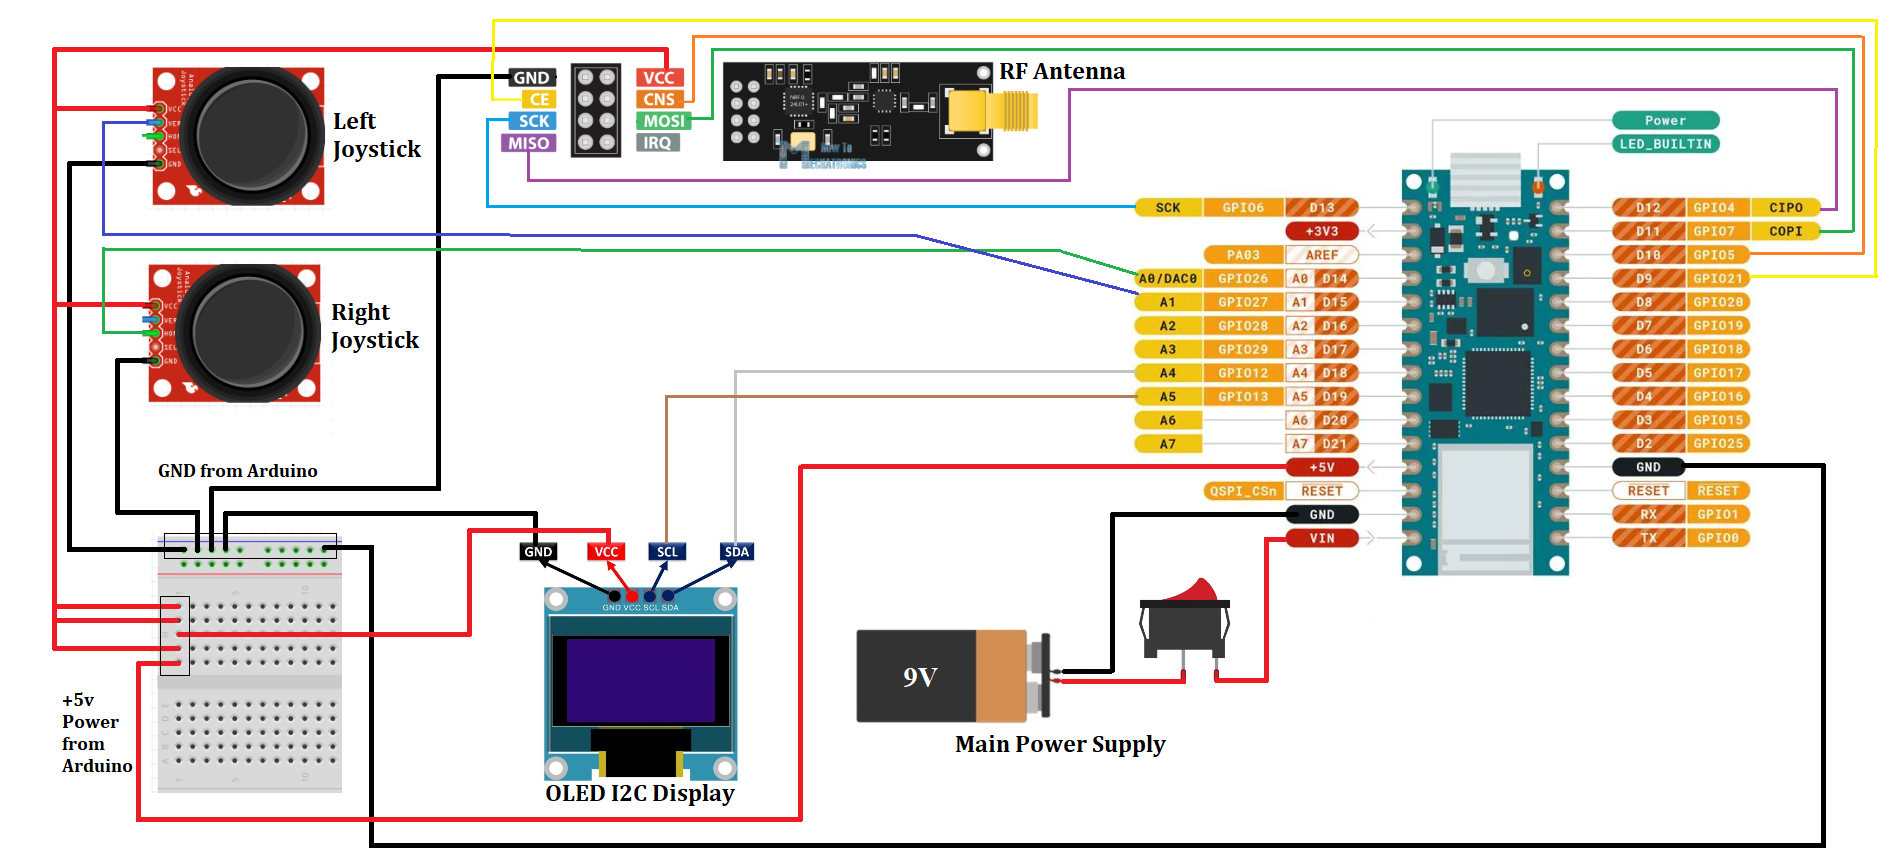
Picture diagram of the connections
Demo Videos
Overview of the RF controller and a power-on test
Testing the RF Controller on my 3D-printed RC car